Brain Board

The Brain Board provided with your kit is what runs the code you write and controls the other boards. It consists of a Raspberry Pi 4B and a Student Robotics KCH.
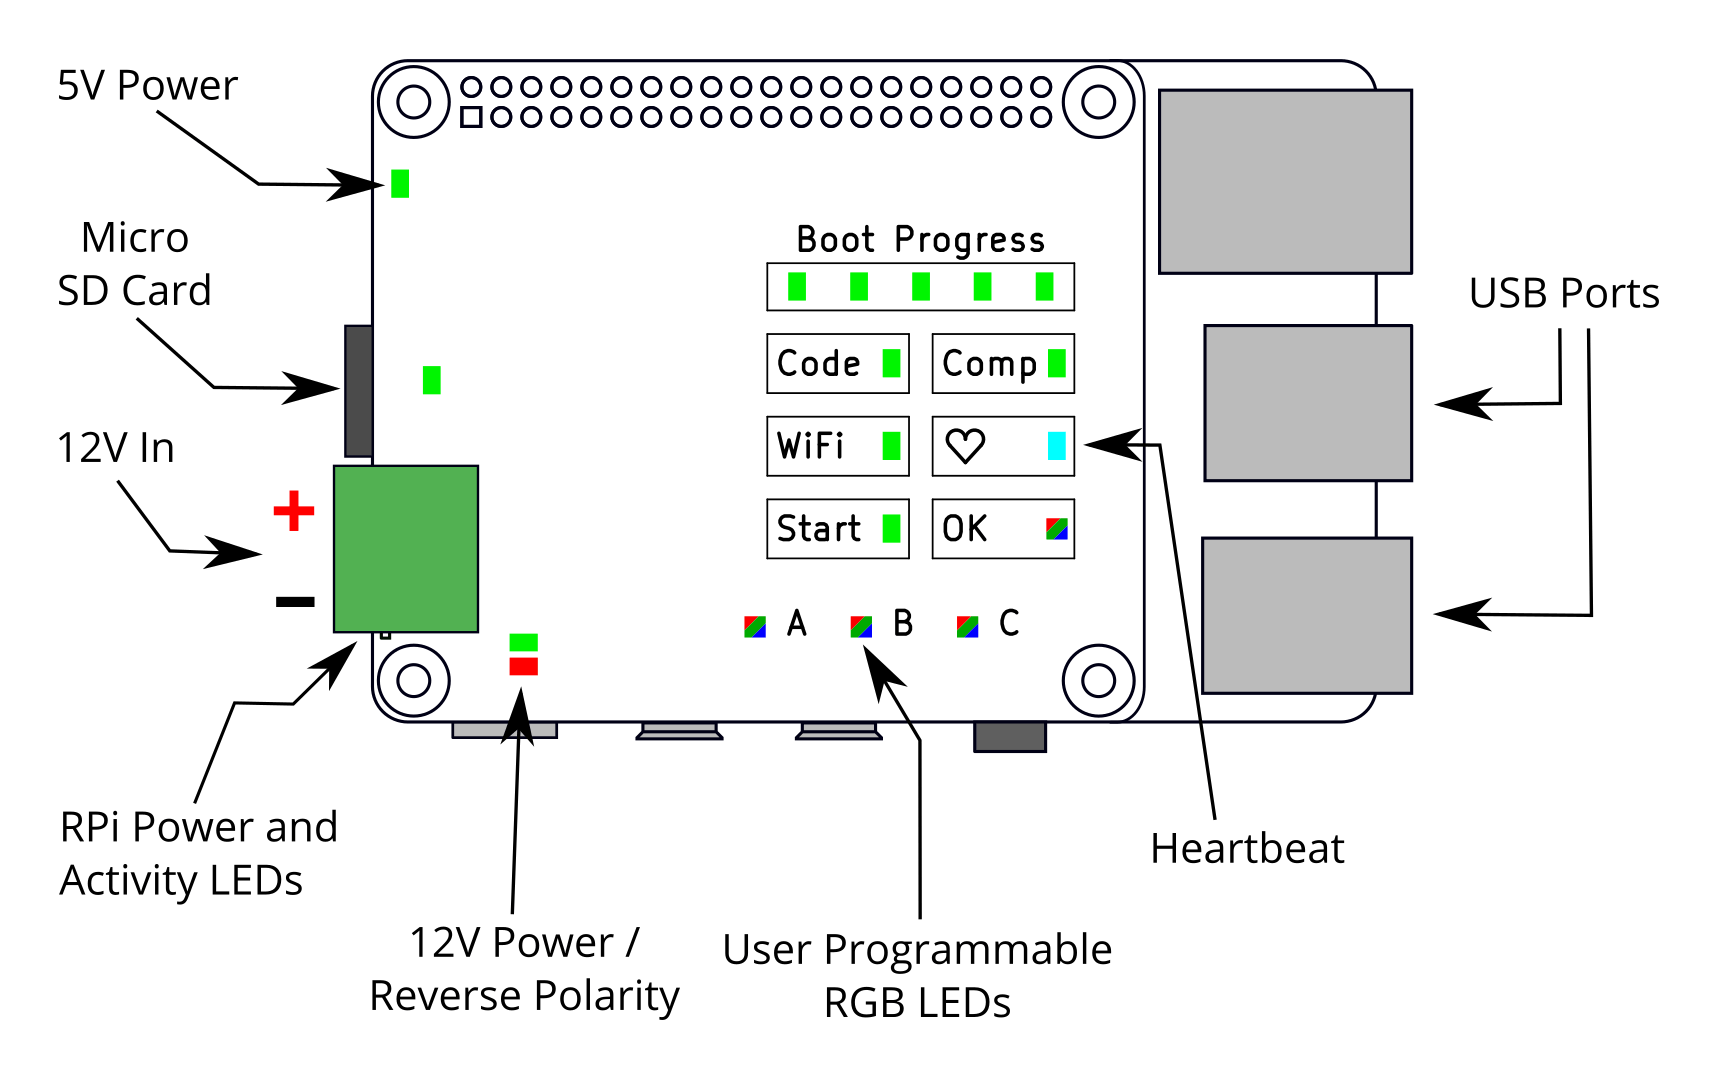
The KCH is the board installed on top of the Pi, it powers the brain and has LEDs to show the current status of the robot. There are also 3 RGB (Red, Green, and Blue) LEDs that you can control from your code – see the Brain Board LED API for details.
Board Diagram

Indicators
| LED | Meaning |
|---|---|
| 5V Power | The Brain Board is powered |
| 12V Power | 12V power is being provided to the KCH |
| Reverse Polarity | The 12V power is reversed |
| Boot Progress | Progress Bar for Brain Boot Progress |
| Code | A USB containing code is plugged in |
| Comp | The Robot is in Competition Mode |
| WiFi | The Robot WiFi hotspot is running |
| ♥ (Heartbeat) | Blinks when the Brain is running |
| Start | The Robot is waiting to start |
| OK | Shows the code status, see below table |
OK LED
The OK LED shows the status of your code using different colours.
| OK LED Colour | Meaning |
|---|---|
| Off | No code available |
| Cyan | Your code is starting |
| Yellow | Your code is running |
| Magenta | Your code has been killed |
| Green | Your code has finished without errors |
| Red | Your code has crashed |
Powering the Brain Board
Your Brain Board will not power on unless it’s connected to the “L2” port on the Power Board. This is because the rest of the power outputs are disabled until your code runs.
Student Robotics OS
The Raspberry Pi runs a custom operating system that contains the Student Robotics software. The OS contains a set of pre-installed python libraries that you can use, the list of which can be found here.
Sometimes the OS on your Brain Board may need to be updated, the steps to do this can be found on the tutorial page.
The latest version of the OS is currently 2025.0.0.
See the Student Robotics OS page for full details of the different versions.
Robot Settings
Some of the features on your robot are configured using a settings file, called robot-settings.toml.
This file is automatically created on your USB drive the first time that you run any code on your robot.
You can edit the settings file using your IDE or any text editor.
The robot settings file contains the following settings:
| Setting Name | Description | Default Value |
|---|---|---|
team_tla |
Three Letter Acronym (TLA) for your team. | Randomly generated |
wifi_psk |
Password for the Robot WiFi | Randomly generated |
wifi_region |
Region Identifier for the WiFi | GB |
wifi_enabled |
Enables the WiFi | true |
usercode_entrypoint |
The entry point to your Python code | robot.py |
If your robot-settings.toml is not valid, it will be automatically regenerated with valid settings.
This will reset any settings you have changed back to their default values.
We therefore recommend that you do not change your settings file before a competition match.
An error file will be generated if your settings are invalid: robot-settings-error.txt.
This file contains a message explaining the problem and a copy of your old settings.

